(For advice on formatting a film or TV script, click here.)
In my last post, I was rather film-centric. Since then, I've had a request about radio scripts which are different from film and TV scripts in that the character name is usually to the left of their first line of speech. So, using the opening text in my fictional last post, we would have something like this:
TOBY: Ah, Distaff. I'm glad you came round. I need to have a word about your stuffed penguin.
DISTAFF: What about it?
I haven't formatted the above at all. I just wanted to show that they'll be on the same line. Here's how it looks in Word:

You can see (because I have 'show all formatting' on that I have put a couple of tabs in the above, though I haven't done anything else. However, as I've not formatted anything yet, the speech of both characters isn't aligned.
I don't propose to repeat the earlier parts of my previous post so if you want to know the basics of formatting please refer to that entry which can be reached by clicking here.
What we need to achieve are to:
All this, I promise, is really quite simple. Again, it's just a question of learning how, which I hope you'll be able to do here without it causing your brain to implode on itself! :)


You'll get the a dialogue box that looks like this:

We don't have to worry here about the margin becasue we're going to do that later. Here's a picture with a step by step guide on how to format the paragraph:
 In case you can't read the boxes on your monitor, here's what I did:
Now you're document will look like this:In my last post, I was rather film-centric. Since then, I've had a request about radio scripts which are different from film and TV scripts in that the character name is usually to the left of their first line of speech. So, using the opening text in my fictional last post, we would have something like this:
TOBY: Ah, Distaff. I'm glad you came round. I need to have a word about your stuffed penguin.
DISTAFF: What about it?
I haven't formatted the above at all. I just wanted to show that they'll be on the same line. Here's how it looks in Word:

I don't propose to repeat the earlier parts of my previous post so if you want to know the basics of formatting please refer to that entry which can be reached by clicking here.
What we need to achieve are to:
- indent the character's name so that we have some extra left margin;
- align the names with each other;
- align speech;
- set the line spacing to be double spaced;
- ensure we have a line of space between speech.
All this, I promise, is really quite simple. Again, it's just a question of learning how, which I hope you'll be able to do here without it causing your brain to implode on itself! :)
Setting the Radio Dialogue
First of all, select the first line of text by moving the mouse so that the pointy arrow is to the left of the text and pointing towards the top righthand side of the screen, then clicking. The background for the line will loook like this:
Next, bring up the 'Paragraph' panel on the ribbon by clicking on the 'Show Paragraph Dialogue' button (circled in red):

You'll get the a dialogue box that looks like this:

We don't have to worry here about the margin becasue we're going to do that later. Here's a picture with a step by step guide on how to format the paragraph:

- Make sure you have 'Left' chosen from the drop-down list for 'Alignment'. It probably is this value, but I included it here to be sure.
- Under the word 'Special', select 'Hanging' from the drop-down list. Hanging means that our character name and our speech will align differently to each other, but still can be on the same line if we want them to be. Because our 'Left' is '0 pi' and our 'Hanging' is '6pi' character names will always be on the left margin and speech will always be 6 pi in from that. You could make this 9 pi if you have longer character names (or any value you like, really). I just chose 6 pi because it seems to work with my script.
- Select 'Double' for your 'Line spacing' value. This ensures that you speech is double-line spaced.
- Ensure that '0 pt' is set for 'Before' and set the 'After' value to '12 pt'. You'll probably find that 'Before' is already '0 pt' so there may be nothing to do there, and, depending on your version of Word your 'After' will be '6 pt' or '10 pt'. '12 pt' is roughly an extra line of blank space after your character speaks.
- Click 'OK' to close the dialogue box.

Our text is looking good, but there's still two things wrong with it. The first is that the character's name is not uppercase, the second, we're not using one of the recommended fonts (Arial or Times New Roman). We can fix both of these problems with relative ease.
To set the font, decide which of the recommended ones you want (I'm going for Arial) and select it from the fon't drop-down list on the Font panel of the ribbon:

I'm guessing, but it's unlikely your drop-down list will look the same as mine simply because you are very unlikley to have used the same fonts as me recently so that section that lists 'Recently used fonts' will be different and may even have 'Arial' as a listed font if you've used it recently. I have gone down to the 'All fonts' section and selected it from there, but you can always select it from another section if it's showing.
Now, select '12' from the drop-down 'Font size' list:


Now, our first line of radio dialogue is looking properly formatted, so let's define a style. We need to select the whole of our first line of speech. This is now on two lines becuse it was longer than could fit on one once we'd applied our formatting. To select it all you need to keep the mouse left-clicked as you move the cursor over both lines. Here they are selected:


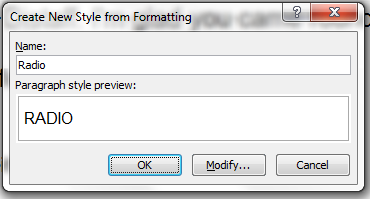
You're new style is now available from the Quick Styles panel on the ribbon:


- Use the Shift+F3 trick. You can do this continually or you can do it once then move your cursor to the next line of dialogue, place it in the character's name and press Ctrl+Y (that tells Word to do exactly what it just did but in this new place).
- Use the Alt+Select method. Oh, that sounds difficult/clever/jolly (delete as appropriate). Well, it's not, really, but it's quick! All you do is hold the Alt key down whilst selecting the text. That is, you simply move the cursor over the lefthand side of the relevent lines (in my example I don't want to stray more than six picas - the value in my Hanging box from earlier). This is what it looks like once done:

- You may not get it right immediately but if you keep trying you'll be just fine. Once you have them all selected, all you have to do is press Shift+F3 and they'll all become uppercase, like so:

Setting the page margin
Radio scripts need lots of margins. The advice often given is 3.5cm left and right. 3.5cm is 8.27 picas (yuk). You could use that value or - what I do - go for 8.5 picas because that's still generous (which is the key) but leaves space between margins that can be usefully computed if you ever need to. The choice, though, is yours. Here's how to do it using MS Word 2010:
Select the 'Page Layout' ribbon:


This gives us the following dialogue box:
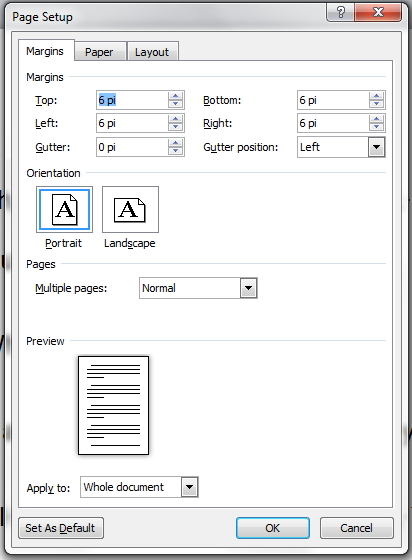
Here's the step by step picture (remember to use the values you choose - I've gone for 12 pi top and bottom, which is just over 5cm, and 8.5 pi left and right, which is just over 3.5cm).


Using Format Painter
Before I go, it's probably worth mentioning the 'Format Painter'. This can be a god-send if you have one line that looks to be formatted correctly but for whatever reason you can't seem to get other lines to behave. The key to using it is to select the whole paragraph that is correct:


Next, simply select the whole of the line, or lines, that need fixing and in an instant they will be transformed, thus:

Yay! It's all fixed! :) You'll notice that the 'Format painter' button automatically deselects at this point, which is a good thing. If you don't manage to select the whole line, you can always start again. Word won't mind and neither will you when you've fixed stuff :) The best part is, you're not going to do any damage!
Have fun and good luck!
PS: Check this post for gotchas with regard to saving and submitting scripts.
PS: Check this post for gotchas with regard to saving and submitting scripts.
No comments:
Post a Comment